Gluten Free Home Brewing Blog
Gluten Free Brewing with BEERMKR
Preface
I want to preface this post with a quick outline of how I am going to organize it. I felt it was necessary to give a little back story (really small) first, and document the full process I took for clarity, before getting into the actual details of doing gluten free brewing with BEERMKR. With that said, you can definitely skip to the bottom of the post to the “Gotchas”, “Open Questions”, and “Playbook” sections if you want. However, I think the other portions may be worth reading as well.
My Beer History
For a long time I have consumed beer, and like many beer drinkers before me, started to gravitate to craft beer. My friends and I always tried the different breweries in our area, and whenever I would visit my parents in Charleston, SC we would go to breweries there too. I always insisted on getting brewery tours, because I wanted to understand how a brewery worked. The more I Iearned, the more I wanted to make beer myself.
Now unfortunately, as I was starting to do that research, and before I had actually started brewing, I found that I had a gluten intolerance, and cut it out completely.
Fortunately, I realized that gluten free beer did exist. However, that left me desiring more. One holiday, my brother gifted me a 1 gallon gluten free brewing kit (LME), and those kits scratched the itch for a bit, but I wanted more. I wanted to do all grain. However, I live in a small apartment in a city, and the equipment needed to brew a large 5 gallon all grain batch seemed just too large for me. Enter BEERMKR!
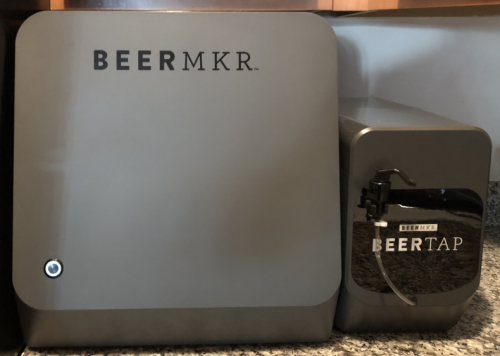
BEERMKR
That was when I found BEERMKR. It was probably some time in 2019 that I discovered it. It was well after they had been on kickstarter, but still before they had actually delivered. As 2020 started to go by (stuck in my home like everyone else), and the summer approached, I posted on the BEERMKR Owners facebook group, asking if anyone thought BEERMKR could do gluten free brewing. Low and behold, the CEO of BEERMKR, Aaron Walls, responded saying that yes it should be possible (sidenote, Aaron as well as there whole team is awesome, and super responsive. A+ for customer service. Unfortunately he has since left the facebook group though). At that point, I was pretty convinced that as long as BEERMKR did deliver, I was going to order it; and in July of 2020 they stated in an update that BEERMKR’s were on a barge to the states. I placed my order excitedly, and waited ... and waited. They arrived in the states per their updates, but then parts needed replacements, and it took time. However, they were shipping them to local beta users in Colorado which was exciting to see. AND then, FINALLY in December 2020, like a present for the holidays, they shipped, and mine arrived!
Getting BEERMKR to Brew Gluten Free
Attempt 1
My first attempt was quite naive. I bought some grains (buckwheat only, we’ll come back to this mistake later) and some enzymes from Gluten Free Home Brewing and threw the grains in. Worked with Aaron to do a custom brew schedule with a pitch time for enzymes and went on my merry way. The notification came at the temperature to add enzymes, I threw them in and stirred it up to distribute them.
Unfortunately, I came out with a whopping 1.007 OG and had very little water in my brew bag. I tossed it out. I emailed both Aaron and GFHB confused; I’ll be honest, I was a little frustrated (and may have asked GFHB if the grains were the issue, spoiler they weren’t), but it was my first attempt.

Attempt 2
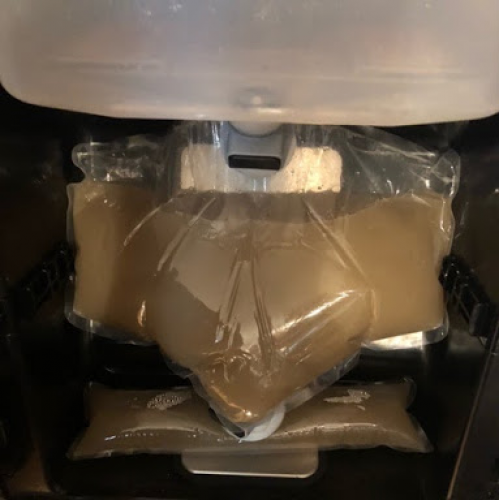
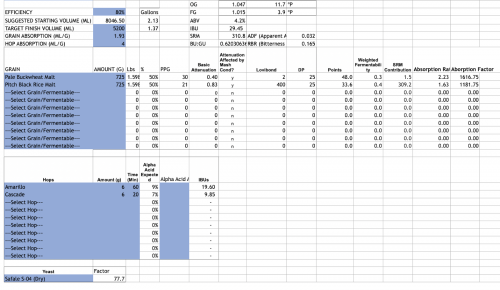
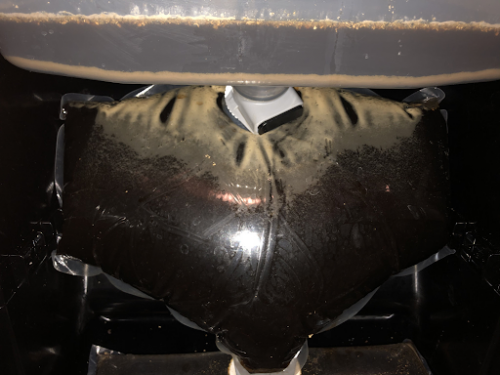
At this point, I’d spent a solid weekend emailing back and forth with both parties and getting details. Aaron and I came to a decision that part of the issue probably had to do with buckwheat being much more absorbent than barley grains. Details here: https://www.glutenfreehomebrewing.com/BLOG/91/Assessment-of-Water-Absorption-Across-Various-Gluten-Free-Grains.php (Note: I’ve actually since updated my version of the spreadsheet BEERMKR gives out for calculating brews to help account for grain absorption my version is attached to this post, it also has extra calculations I added too. It’s not the easiest to add new grains to, but if you can figure out excel, it works well enough). Also through research we thought circulation might have been an issue (buckwheat is notoriously clumpy), so I created a recipe that was 50% pitch black rice, and 50% pale buckwheat; and off we went with round 2. I milled the grains, pitched the enzymes at the right time … and we got an OG of 1.028. The sheet had said at 80% efficiency it should be 1.047. At this point, I was happy to have something, so I pitched the yeast and the steam hops (some details in the gotcha’s) and off it went. Except, I had a clog in the valve from the brew tub to the bag, and when I went to it soon after, I found the water left over was well under (see picture). In any case, I let it ferment, and it came in at 1.02 FG … or so I thought. I later realized that readings with a refractometer are different than a hydrometer (hey, it was my first time with the new gear), so my FG was actually 1.015 -- shout out: https://www.petedrinks.com/abv-calculator-refractometer-hydrometer/. So ok, but not great.
Now I want to stop here for a second and make a mention of the secondary device for BEERMKR (also see gotcha’s), the BEERTAP. It’s worth noting, a lot of BEERMKR owners have not been happy with it, but other than this one experience, it has worked fairly well for me.
So I took the bag (waste bag is disconnected, so you don’t have too much sediment), put it in my BEERTAP … and pressurized beer all over my kitchen! One of the red valves blew out, I unscrewed the co2 and saved most of it. I ended up putting it in bottles instead, yay uncarbed, slightly alcoholic beer!
Attempt 3
Working with, Aaron and GFHB, I decided on a more complicated process (in steps):
- If buckwheat: Boil water to 195f, Use #g*4 = ml water in pot with buckwheat. Cut heat, add buckwheat, stirring in, then let sit for 30 mins. Pour in buckwheat into caddy, with water/grains in step 1.
- Put water (with mixed sugars if necessary)/grains in. (Water, wet grains, grains, rest of water)
- 10 minutes in take pH reading (goal of 4.6-4.8), if high add lactic acid stirring it in
- .3 mL per .1 off is probably a good starting point (did some reading, where 1 mL -> .1 shift/5 gallons. BEERMKR produces ~1.2 gallons)
- add enzymes - Press the button, increase temperature to 145F.
- Hold for 90 minutes.
- Increase to 165F.
- Hold for 30 minutes.
- Cool down to pitch temp.
Also at the suggestion of GFHB, it was recommended to switch to using Ondea Pro + Ceremix Flex instead of the SEBAmyl enzymes I had been using (I’ve actually used them + the SEBAmly all together since). The plan seemed fool proof! Research was done! Aaron pushed the brew schedule to my device, and through my app, and off it went. This time I used a grain bill of: 70% rice, 20% buckwheat, 10% cane sugar (BEERMKR has instructions about using non grain fermentables, but I’ll spare you the details here). Unfortunately, a couple things went wrong:
- Aaron sent a bad recipe to my device, which caused it to sit at about 118F for hours, while I slept rather than increasing to the mash out temperature. He eventually rectified this, but not sure if that did anything weird to the grains (it ended up tasting very grassy/sour)
- My playing with pH probably meant I added lactic acid when I didn’t need too, and also may have helped make it sour
- It ended up at 1.035 OG instead of the target of 1.047.
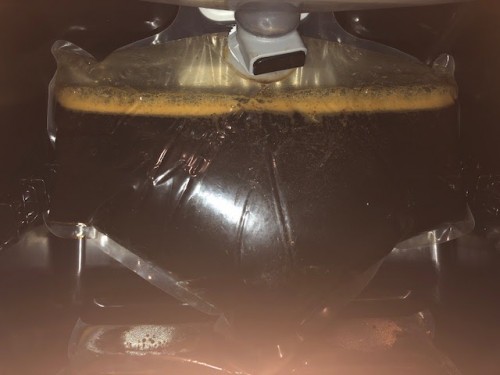
- The BEERMKR clogged with the grains (see picture). I was able to alleviate this by unplugging (a risky proposition) as well as pushing up on the connection. Sidenote, Aaron said they are working on a filter to help prevent clogging.
However, I pitched the yeast, threw in the steam hops, and off we went. To a week later a FG of 1.010. A decently fermented 3.27%, not my goal, but not bad (though at the time, I had to figure out I was measuring incorrectly with the refractometer).
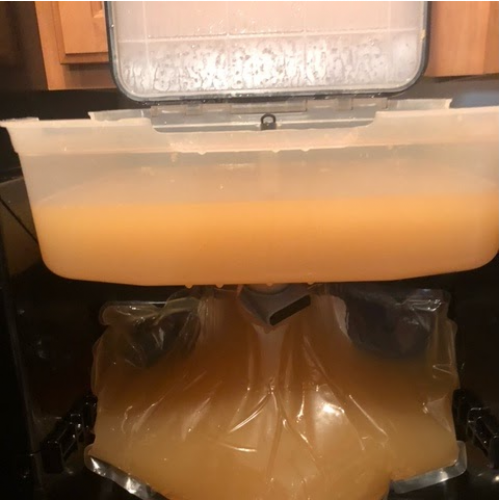
Attempt 4 - Curveball
At this point, frustrated had seeped in. I wanted some reward for my hard work, so I decided I was going to try to make a pineapple hard seltzer. For this, I didn’t need anyones help, I mixed the sugars (800g, OG goal of 1.059) in my water, poured it in the BEERMKR. Started a DIY in the app, and off we went. Once it had mashed out and cooled down to pitch temperature (which was honestly probably unnecessary as long as I mixed it well), I took a refractometer measurement and came to 1.056. Which had me happy, I pitched the yeast, and off we went. I took measurements almost daily of the gravity. Having done research I knew that cane sugar water would get acidic fast, and daily I added in calcium carbonate to help keep the yeast going, and I hit a FG of 1.011. So 6.06% ABV, pretty close to my goal of 6.6%, and very alcoholic. I mixed in Pineapple extract before I threw it in my BEERTAP and it carbonated. Unfortunately, it tasted very yeasty, but I think part of that may have to do with me rushing to drink it, but it worked! Progress!
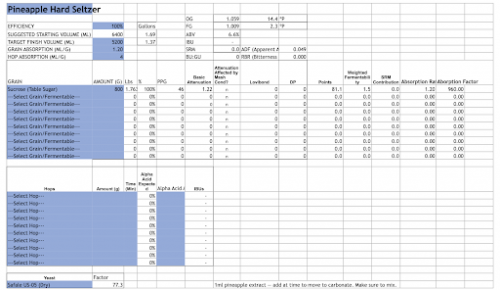
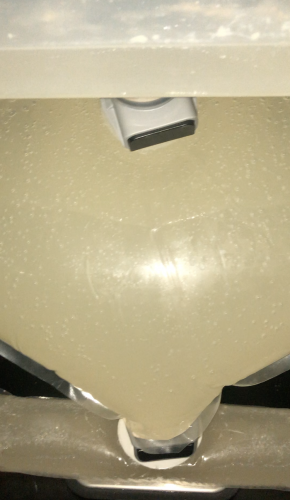
Attempt 5 - Success
So I had had 3 failures, and one fairly successful seltzer. After re-reading this article: https://www.glutenfreehomebrewing.com/all_grain_brewing_tutorial.php I had a plan. So I sent an email to Aaron to push the following brew schedule to my device (notes + adjustments he made included):
- Put grains + water in (with pre-boiled buckwheat if necessary).
- Hit button
- Device raises the temperature to 128F.
- Send push notification to pitch enzymes. Pitch them in, mix, remove squeeze bar for a little, then replace it, do a few times to help get water to move up and down and help distribute.
- Wait 10 minutes at 128F. (set a timer on phone)
- Take pH reading, and adjust to 4.6-4.8. (Sidenote: I didn’t need to add any lactic acid), then hit the button on front of the device.
- Device waits 20 minutes at 128F.
- Device raises to 145F.
- Hold at 145F for 75 minutes. (This actually didn’t happen, when we ran it, I’m still confused as to why it worked a little, but maybe because BEERMKR is sooo slow at increasing temperature we were in the range long enough, I do however want to work with Aaron on the next one to have this actually happen)
- Increase to 170F (this is the absolute max that BEERMKR supports)
- Hold at 170F (I initially asked for 35 mins here, I think we spent an hour+ at this temperature in actuality).
- Reduce to yeast pitch temperature.
Aaron pushed that to my device, I milled my grains (recipe sheet below, I did sprinkle some sugar for fun that I don’t think affected the actual OG) and out came an OG of 1.045. Beyond the expected goal! Excitedly, I emailed both Aaron and GFHB to share the good news! I then pitched my hops, and put in my yeast and off we went.
A week later I took a FG reading, and it was 1.009! Success!
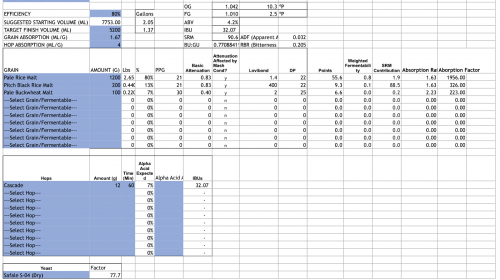
The details
How BEERMKR works (my “limited knowledge”)
BEERMKR at its core is a fairly simple device. You put grains in a grain bed, put some water in, it heats up the water at specific intervals, extracting the sugars in the process. Then once it has cooled down, you pitch yeast and it manages all the fermentation for you. If you’re not familiar I recommend checking out this page on their website: https://BEERMKR.com/pages/technology.
My Open Questions
I have a few open questions on using BEERMKR, that are listed here in no particular order:
- On the final attempt did that lack of sitting at 145F affect my eventual efficiency? Could it have gone better
- Is the Beemkr limit of 170F an issue with some grains. Specifically Buckwheat, do I need to continue to do my pre-boil process of buckwheat to help get it to gelatinize?
- When will BEERMKR add support so I don’t need to email Aaron to get my brew schedule pushed? (Though you still start the process when you want with a button push)
- Will my success with #5 be repeatable? Was it a fluke? I sure hope not.
- Were my earlier brews actually better with sugar extraction? I took my refractometer samples from places before removing the squeeze bar, which means things weren’t necessarily mixed well.
- I’ve currently been mixing all 4 enzymes I have. Do I need just the main 2 (Ondea Pro + Ceremix)? Most likely yes, but have not tested it.
Gotchas
Here’s a quick list of a bunch of the “mistakes” or gotchas with the device I found
- BEERMKR has no circulation. That means that getting an even distribution of water to grains is challenging. That is why BEERMKR takes a long time to do it’s mashing process. However, removing the squeeze bar, and re-inserting it, as well as careful pushing on the waste bag on the bottom is useful.
- I’d love for them to add some form of circulation add-on device, or make improvements in v2 for this.
- I actually can’t harp on this enough, the lack of circulation seems like the largest shortcut they took (even more than no boil, next bullet)
- Steam hops! BEERMKR has no boil process, as it cannot exceed 170F. If you’re a seasoned brewer, this might frustrate you. In my experience, their Steam hops are good. They are isomerized hops. They have been pre-boiled for specific times, and when dropped into your wort, disperse the right amount of hop flavor within it. BEERMKR does say you can boil hops on the side yourself, create hop water, and pour that in if you prefer.
- Refractometers for FG need to use a calculation: https://www.petedrinks.com/abv-calculator-refractometer-hydrometer/
- Grains have different absorption rates, be sure to calculate your water accordingly (sheet I shared should be helpful). Also, don’t overfill the tub, water coming out of the top of BEERMKR and cleaning it is not fun. Though it smells good, it is very sticky.
- During fermentation the BEERMKR vibrates a few times a day to get sediment into the waste bag, it can be loud and annoying, especially in your kitchen. I keep mine on a mat.
- I have to, at least for now email Aaron whenever I want to run a brew. Aaron, if you’re reading this, I can’t wait until this isn’t the case! I think this one might be the one people most care about, so I’m bolding it.
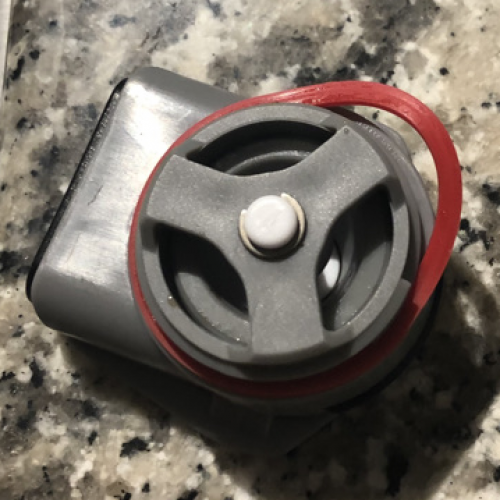
- The BEERTAP is finicky, a lot of people on the BEERMKR Owners facebook group have stopped using it. I personally experienced some issues (see picture where rubber came out, they sent me new ones which seemed to fix my issues), but I’d love for it to work perfectly, I think the BEERMKR team will get there. If you’re uncomfortable with the risk many people are transferring to kegs, bottles, or other devices instead.
My Playbook going forward
- Email Aaron to push recipe (hopefully with 145F hold fixed)
- Mill grains, pre-boil buckwheat.
- Put water, grains, water in per BEERMKR process.
- Press button.
- Wait for notification to pitch enzymes
- Pitch enzymes (2-3 ml of each per pound of grain), mix it up and remove/re-add squeeze bar.
- Wait 10 minutes… take pH, adjust if necessary.
- Press button
- Let BEERMKR do it’s thing.
- Get notification it has cooled.
- Take wort OG reading
- Pitch yeast + steam hops.
- Wait until finished fermenting.
- Transfer beer to BEERTAP